 |
||||||||||||
|
The first app up for review is Keynote, the little brother/sister to its full-blown sibling Keynote that runs on Macs and is similar in many respects to PowerPoint. Keep in mind that no app will ever run like the complete version you would use on a computer, this much you ought to know going into the iPad world of apps. That said, Keynote is easy to use and the Help section is very straight forward. In fact, you will be running your first presentation within minutes of purchasing Keynote!
What are some basic things to know from about Keynote from the outset? To start Keynote, simply tap “Presentation,” tap the + sign and tap on ‘Create Presentation.’ If, however, you wish to import a presentation instead of starting a new presentation, choose from one of three locations: iTunes, iDisk, or a server. There are several templates for new presentations, tap one of these and double tap to enter text. Tap the ‘play’ symbol to start the presentation and pinch to stop the presentation.
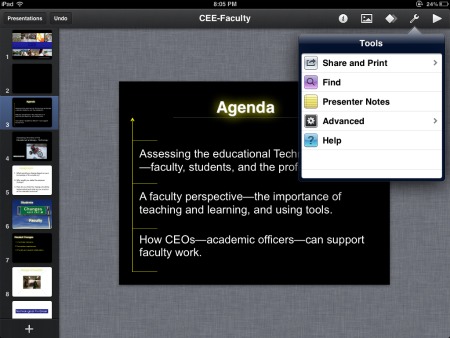
The ‘tool’ symbol in the menu allows for sharing and printing slides, along with a ‘find’ option, an ‘adding notes’ option, and an ‘advanced’ option for slide numbers, interactivity, looping and using your iTouch or iPhone to run an iPad presentation. Note: using an iTouch or iPhone to run your presentation will require another app called ‘Remote’ ($0.99). One thing to keep in mind: Remote will only run with WiFi enabled, not with Bluetooth as stated in Apple Support Some of the fixes offered by others range from running third party-plugins to turning off the firewall, none of which I really care for. Here is a quick fix: plug in an Apple Airport Express (no cable required) then connect both devices to that WiFi and you are ready to go. There are also options for inserting shapes into key and the app has multiple ‘undo’ options but holding the ‘undo’ will allow for the selection of ‘redo.’ Tap and hold a slide to: cut, copy, delete, or skip (slides are arranged vertically along the left side of the iPad screen).
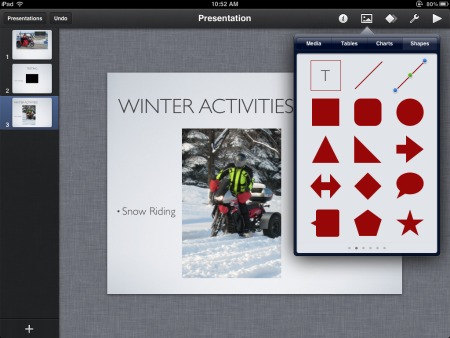
To delete a presentation, tap and hold. Once the presentation starts shaking, select the ‘share’ (curved arrow), duplicate (‘+’ sign), or the delete option. The insert option allows you to insert media (photos and video), tables, charts, and shapes. There is a trick, however, to inserting videos: they have to be emailed and pulled in using the reply/forward/save option in the e-mail app where they will show up as a video in the Media section of the insert tool. This trick took some effort to figure out but it really works!
One last thing about the Keynote app: it has a built in pointer—press and hold any point on the iPad when in presentation mode (need to tap the ‘play’ icon to get to the presentation mode) and a pointer appears which can be moved to any area of the screen.


Summary:
There are many other presentation apps, all of which allow you to import a Keynote for Mac or Windows/Mac PowerPoint presentations. Some of these other apps include: Limelight (free), 2Screen ($4.99), Power Presenter ($1.99), and Quick Office ($24.99; this app is a mobile office suite). Some of these apps are a bit more robust than others but all of the presentation apps can do a decent job and most do it rather well. Connect Keynote to a display monitor and you have the option of seeing your notes, all of your slides (on the left pane, toggle mode), including what is being projected. Keynote, in my estimation is a great app but it is a bit over priced compared to similar presentation apps and Apple need to give us the option to embedded audio into presentations.
Dave Yearwood, associate professor and chair of the technology department, University of North Dakota.


